
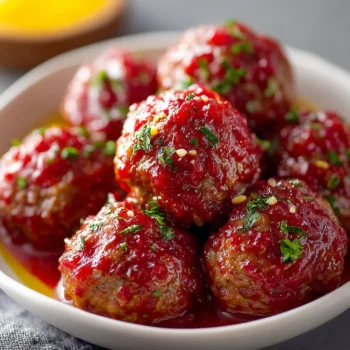
Introduction to Cauliflower Buffalo Wings
Picture this: it’s game day, the living room is buzzing with excitement, and you’re looking for that perfect snack to keep everyone happy. Enter Cauliflower Buffalo Wings! As a busy woman juggling work, family, and everything in between, I know how precious time is.

Why You’ll Love This Cauliflower Buffalo Wings
Let me tell you, the beauty of these Cauliflower Buffalo Wings lies in their simplicity. With just 15 minutes of prep time, you can have these ready to pop in the oven. And the best part? Minimal cleanup! No one wants to spend game day scrubbing dishes, right? Plus, these wings are vegetarian, making them a fantastic option for those looking to cut down on meat without sacrificing flavor. The crispy texture from the panko crumbs combined with the tangy, spicy hot sauce creates a taste sensation that’s downright irresistible. Trust me, once you try them, you’ll be hooked!
- Introduction to Cauliflower Buffalo Wings
- Why You’ll Love This Cauliflower Buffalo Wings
- Ingredients You’ll Need
- How to Make Cauliflower Buffalo Wings
- Tips for Perfect Results
- Essential Equipment Needed
- Delicious Variations of Cauliflower Buffalo Wings
- Serving Suggestions
- FAQs About Cauliflower Buffalo Wings
- Final Thoughts on Cauliflower Buffalo Wings
Ingredients You’ll Need
Here’s what you’ll need to create these mouthwatering Cauliflower Buffalo Wings:
- Cauliflower: The star of the show! It absorbs all the flavors beautifully.
- All-purpose flour: Helps create a batter that sticks to the cauliflower.
- Water: Combines with the flour to form a smooth batter.
- Garlic powder & Onion powder: Adds depth and flavor to the batter.
- Salt & Black pepper: Essential for seasoning.
- Panko crumbs: These give the wings their signature crunch.
- Hot sauce: The key to that classic buffalo flavor.
- Butter: Melts into the hot sauce for a rich, velvety coating.
Feel free to make substitutions based on your dietary needs. For instance, you can use gluten-free flour and panko crumbs if you’re avoiding gluten, or swap in vegan butter to keep it plant-based. Remember, printable measurements are available at the end of this article for your convenience.

How to Make Cauliflower Buffalo Wings
Step 1 – Prep Ingredients
First things first, preheat your oven to 450°F (230°C) and line a baking sheet with parchment paper. This ensures easy cleanup and prevents sticking. In a large bowl, whisk together the flour, water, garlic powder, onion powder, salt, and black pepper until you have a smooth batter. This is the foundation of your wings, so make sure it’s well-mixed.
Step 2 – Begin Cooking
Now, the fun part! Dip each cauliflower floret into the batter, letting any excess drip off. Then, roll them in panko crumbs until they’re fully coated. Arrange the florets on your prepared baking sheet, making sure they’re not touching. Bake for 20 minutes, turning them halfway through to ensure even crispiness.
Step 3 – Combine Ingredients
While the cauliflower is baking, it’s time to prepare the sauce. In a small saucepan over low heat, combine the hot sauce and melted butter. Stir until they’re well combined. This mixture will coat your wings, giving them that signature buffalo flavor.
Step 4 – Finish and Serve
Once the cauliflower is done baking, remove it from the oven and toss it in the hot sauce mixture until each piece is evenly coated. Return the cauliflower to the oven for an additional 10 minutes to achieve that perfect crispiness. Serve immediately with your favorite dipping sauce, and watch them disappear!
Tips for Perfect Results
For those who love an extra crunch, broil the cauliflower for an additional 2-3 minutes after baking. Adjust the amount of hot sauce to suit your spice preference—more for a fiery kick, less for a milder taste. If you have leftovers (though I doubt you will!), store them in an airtight container in the fridge for up to 2 days.
Essential Equipment Needed

To make these Cauliflower Buffalo Wings, you’ll need:
- Baking sheet
- Parchment paper
- Large bowl
- Whisk
- Small saucepan
Having these tools on hand will make the process smooth and efficient.
Delicious Variations of Cauliflower Buffalo Wings
Looking to switch things up? Try these variations:
- Keto-friendly: Use almond flour instead of all-purpose flour.
- Low-carb: Skip the panko crumbs for a lighter version.
- Gluten-free: Substitute with gluten-free flour and crumbs.
- Spicy twist: Add a pinch of cayenne pepper to the batter for an extra kick.
Serving Suggestions
These wings pair perfectly with classic sides like celery sticks and blue cheese dressing. For a refreshing contrast, serve them alongside a cold beer or sparkling water. If you’re feeling fancy, complement them with a fresh garden salad for a complete meal.
FAQs About Cauliflower Buffalo Wings
- Can I make these ahead of time? Absolutely! Prepare and bake the cauliflower, then reheat and toss in sauce before serving.
- What if I don’t have panko crumbs? No worries! Regular breadcrumbs or crushed cornflakes work as great alternatives.
- How can I make them less spicy? Simply reduce the amount of hot sauce or opt for a milder sauce.
Final Thoughts on Cauliflower Buffalo Wings

In conclusion, Cauliflower Buffalo Wings are a delightful game day snack that’s both simple and delicious. They’re a spicy treat that’s easy to prepare and sure to impress your guests. So, why not give them a try? I promise, they’ll become a staple in your game day repertoire!
Print
Cauliflower Buffalo Wings: Your Ultimate Game Day Snack!
- Total Time: 45 minutes
- Yield: 4 servings
- Diet: Vegetarian
Description
Crispy, tangy, and spicy cauliflower buffalo wings perfect for game day snacking.
Ingredients
- 1 large head of cauliflower, cut into florets
- 1 cup all-purpose flour
- 1 cup water
- 1 teaspoon garlic powder
- 1 teaspoon onion powder
- 1/2 teaspoon salt
- 1/4 teaspoon black pepper
- 1 cup panko crumbs
- 1 cup hot sauce
- 2 tablespoons butter, melted
Instructions
- Preheat your oven to 450°F (230°C) and line a baking sheet with parchment paper.
- In a large bowl, whisk together the flour, water, garlic powder, onion powder, salt, and black pepper until smooth.
- Dip each cauliflower floret into the batter, allowing any excess to drip off, then coat with panko crumbs.
- Place the coated florets on the prepared baking sheet and bake for 20 minutes, turning halfway through.
- In a small saucepan, combine the hot sauce and melted butter over low heat, stirring until well combined.
- Remove the cauliflower from the oven and toss with the hot sauce mixture until evenly coated.
- Return the cauliflower to the oven and bake for an additional 10 minutes until crispy.
- Serve immediately with your favorite dipping sauce.
Notes
- For extra crispiness, broil the cauliflower for an additional 2-3 minutes after baking.
- Adjust the amount of hot sauce to suit your spice preference.
- Prep Time: 15 minutes
- Cook Time: 30 minutes
- Category: Appetizer
- Method: Baking
- Cuisine: American
Nutrition
- Serving Size: 1/4 of recipe
- Calories: 250
- Sugar: 2g
- Sodium: 800mg
- Fat: 10g
- Saturated Fat: 3g
- Unsaturated Fat: 6g
- Trans Fat: 0g
- Carbohydrates: 35g
- Fiber: 4g
- Protein: 5g
- Cholesterol: 10mg
Related Posts
-
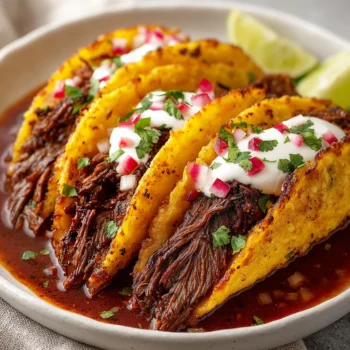 Discovering My Ultimate Favorite Birria Tacos RecipeUltimate Favorite Birria Tacos Recipe: A Flavorful Journey Discovering My Ultimate Favorite Birria Tacos Recipe…
 -
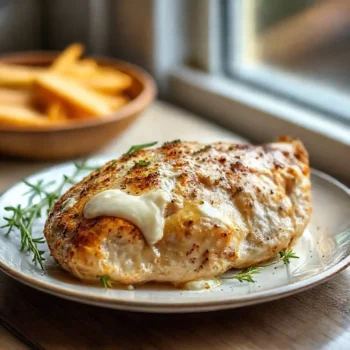 Melt in Your Mouth ChickenThe Culinary Quest for Perfection: Mastering Melt in Your Mouth Chicken In the vast universe…
 -
 Authentic Italian Caprese Salad: The Ultimate Refreshing Summer...Introduction to Italian Caprese Salad Ah, the Italian Caprese Salad! It's like a little slice…
 -
 Tuscan Sunset BruschettaTuscan Sunset Bruschetta is a delicious and colorful appetizer that combines the flavors of Italy…
 -
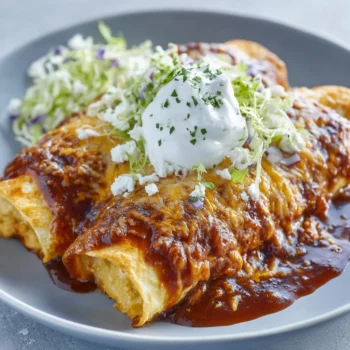 Chicken EnchiladasProfessional Recipe: Classic Creamy Chicken Enchiladas | Step-by-Step Guide Classic Creamy Chicken Enchiladas: A Crowd-Pleasing…
 -
 BBQ Pulled Chicken Sliders: The Ultimate Game Day...Introduction to BBQ Pulled Chicken Sliders Hey there, fellow food lovers! If you're anything like…
 -
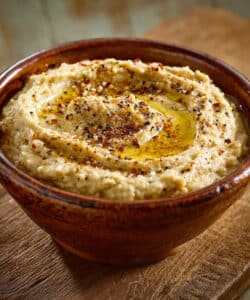 Spanish Roasted Garlic Eggplant Dip: A Creamy Appetizer...Introduction to Spanish Roasted Garlic Eggplant Dip Hey there, fellow food lovers! If you're anything…
 -
 9. Pomegranate Molasses Lamb KoftaPomegranate molasses lamb kofta is a flavorful and exotic dish that combines the richness of…
 -
 Buffalo Cauliflower Bites: The Ultimate Game Day Snack!Introduction to Buffalo Cauliflower Bites Let me tell you, Buffalo Cauliflower Bites are a game-changer…
 -
 Spanish Garlic Shrimp: The Ultimate, Flavorful Tapas ClassicIntroduction to Spanish Garlic Shrimp (Gambas al Ajillo) Let me take you on a little…
 -
 Grilled Octopus with Romesco SauceGrilled octopus is a dish that originated in the Mediterranean region, where seafood is a…
 -
 Crispy Lotus Root Chips with Gochujang AioliThin slices of lotus root transform into delicate, golden chips with a satisfying crunch. They…


")
📧 Save This Recipe to Your Email
Enter your email address below and receive this recipe instantly.
🍴 More Recipes
Coconut Lime Soup with Thai Basil and Shrimp
December 4, 2025Mediterranean Quinoa Tabbouleh: A Fresh Summer Salad Delight
October 4, 2025Busy Weeknight Hero: This Pizza Casserole Will Save Dinner (and Your Sanity)
April 24, 2025Iced Chai Protein Latte: Boost Your Day with Spice!
August 15, 2025Wholesome Mediterranean Chickpea Flatbread: The Perfect Easy Lunch Idea
September 10, 2025